Wednesday, July 11, 2012
Open Printmaking Portfolio: Class Five
Master woodblock printer and teacher Alex Nutini came to our fifth class to show his work and demonstrate his printing process. We were all amazed at his impromptu registration system!
Wednesday, June 27, 2012
Open Printmaking Portfolio: Class Four
Students worked individually in class today and we viewed the cases and walls where they will be showing their final work in August. The 16 x 20 inch frames in the photos are available for the exhibition.
Wednesday, June 20, 2012
Open Printmaking Portfolio: Class Three
In our third class artist and co-founder of Printeresting Amze Emmons gave individual ten minute critiques to each student.
Tuesday, June 5, 2012
Open Printmaking Portfolio
Class One: Introductions and Monotypes
In the first class we reviewed previous work and created an exquisite corpse monotype together.
Friday, March 23, 2012
Japanese Woodblock Printing and Collographs
In class on Thursday I went over a quick Japanese woodblock carving and printing demo. After playing around with some of the tools from Baren Mall on scrap pieces of wood from McClain's, I showed everyone how to print a simple woodblock.
After soaking the blocks in water for a few minutes, you add a few drops of watercolor mixed with Nori (rice paste) to the block.
Next you use this traditional brush to spread the ink evenly across the block.
You then lay your hoshi printing paper over the block. Ideally your paper would be decanted in a plastic bag with spritzed newsprint in between each sheet of hoshi.
With freezer or wax paper on top, you use a barren to place even strokes of pressure across the paper.
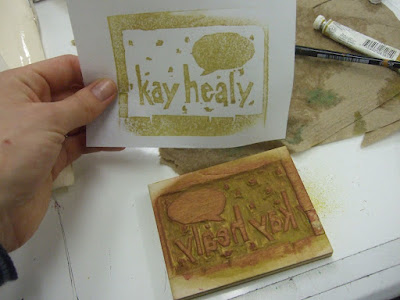
Then you peel off your print!
Many of the students also printed their collograph plates. Nate made many blind embossments of the above plate.
This is Jamie's colorful collograph.
Nate and Jamie in action.
Sunday, March 18, 2012
Long Stitch Binding
In our last class we went over a classic bookbinding technique called the long stitch. First we cut down our text weight paper to make 20 sheets of 8 1/2 x 6 inch pieces grain shortNext we nestled four sheets together and folded 5 sections that were 4 1/4 x 6 inches.
We then cut down our cover paper to be 17 x 6 1/4, and then created the spine by measuring from the left 8 1/8 inches and folding and then 3/4 of an inch to the right and folding. Next, we placed all five sections inside the spine and scored 1/8 of an inch from the edges and folded the front and back flaps over. These flaps can be trimmed or left to give the book more weight.
We then created both a text jig and cover jig to put holes into the sections and the cover spine
Next we used seven lengths of thread and began sewing the last section into the bottom hole of the book, starting from the cover in.
We wove the thread up to the top of the section through the cover and then moved to the adjacent hole and came down the section and tightened the threaded sections, making sure to always pull towards the direction we were sewing. We next knotted the threaded needle with the tail of the thread and did a kettle stitch before moving on to the third section and weaving to the top.
At the top of the third section we did a kettle stitch to the previous loop of sections one and two, before moving on to sections four and five (which also had a kettle stitch in between sections)
Sunday, March 4, 2012
Japanese Stab Binding and Accordion Books
This week we made a more in-depth version of the Japanese Stab Binding, using screenprinted papers as our covers.
Everyone cut down their paper and made a jig in order to accurately punch holes into the covers and forty sheets of paper to be bound.
Making the holes larger than usual with the awl and using thinner thread made the process somewhat easier.
We then sewed the book together using the technique taught it session 4.
Everyone left with a blank book with screenprinted covers.
We then went over how to connect folded accordion books to create larger accordion structures. Everyone will bind their monotype exquisite corpse prints for Session 7.
Subscribe to:
Posts (Atom)